Tuesday, June 30, 2009

Overlapping Frames In Chicago


Chicago Campus 1 (Overlapping Frames); Zeiss Ikon Nettar 518/16, Ilford HP5+

I continued my experiments with overlapping frames on 120 film in Chicago, and here are some of the scanned results; these demonstrate another of the frame overlap techniques from my list in my first post on the subject. The first two are using the second method, with 3 overlapping frames.

Chicago Campus 2
Chicago Campus 2 (Overlapping Frames); Zeiss Ikon Nettar 518/16, Ilford HP5+

As you can see from these scans, this method of overlapping the frames really gives a wide image. Additionally, while there are two join points, with careful placement of the joins, small errors in the overlap lend character to the image rather than looking like errors. For example, the building in the first image looks like a somewhat crooked building, making the image slightly whimsical; in the second image, the two turrets from the two images just look like two turrets on the chapel.

Bond Chapel
Bond Chapel (Overlapping Frames); Zeiss Ikon Nettar 518/16, Ilford HP5+


This final image is another example of the first technique, but with a twist applied. I wanted to see if the overlapping technique would be helped by handholding two long exposures. My conclusion is that no, it is not. The movement does not mask the overlap in any appreciable way, and while it does look a little like a ghost movie, that wasn't the effect I wanted. My next plan is to try purposefully having the images out of focus, which will hopefully impart a dreamier look.

For now though, I'm very happy with the first two images here, and will be printing them as cyanotypes (the original purpose of this exercise); scans of those coming soon!

Friday, June 12, 2009

Yashica D

Yashica D
Yashica D; Canon 30D, Canon 200mm f/2.8L, Canon 430EX

I've been thinking about getting a TLR for a while now, and considering various models. Recently, a fellow photographer on a forum I read was selling his Yashica D TLR, and I decided that this was a good time to get one. It arrived, and I had a chance to put it through its paces as well as take some photos of it.

Yashica D Taking Lens
Yashica D Taking Lens; Canon 30D, Canon 200mm f/2.8L, Kenko 56mm extension tubes, Canon 430EX

Vital stats:

  • 120 film in 6x6 format

  • 80mm Yashikor lens pair, f/3.5 - f/22

  • Copal MXV shutter, B, 1-1/500 seconds

  • Ground glass focusing with pop-up magnifier and sports finder

  • No double exposure prevention or shutter/film transport coupling at all; you must cock the shutter manually after setting the speed, and you can continue to expose the same frame as many times as you like

  • Knob film advance with automatic spacing

  • No built in metering; use a handheld meter or sunny 16


Yashica D & Luna Pro F
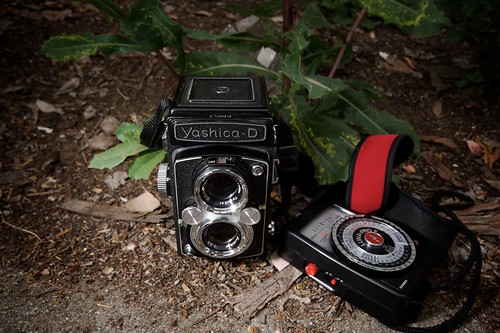
Yashica D & Luna Pro F; Canon 30D, Sigma 10-20mm, Canon 430EX


I took it for a quick photo-walk on the way to work one day to get some first impressions and test it out. I quickly decided that I love having the ground glass to focus on, although it will take me a little bit to get used to the left-right reversal. Being able to actually see the image almost exactly as it will appear on the film is very very nice. Furthermore, I feel that having the viewing not be at your eye makes it feel more like you are looking at a picture, rather than looking at an object through a viewfinder. Very helpful for visualization.

Yashica D Shutter Release Yashica D Yashikor
Yashica D Shutter Release & Yashica D Yashikor; Canon 30D, Canon 200mm f/2.8L, Kenko 56mm extension tubes, Canon 430EX


In operation otherwise, it's very nice. Having to manually cock the shutter is not especially onerous (especially since my other medium format camera requires it too). A little viewing window just above the viewing lens means that you can set the shutter speed and aperture while keeping the camera at your waist the whole time. Like all TLRs, it suffers from the "viewfinder camera" problem, where what you see through the viewing lens (or viewfinder) is not exactly what the taking lens sees, but at reasonable distances this stops being an issue; close-up, I guess I'll just have to learn to compensate for it.

Pink Flower Bush
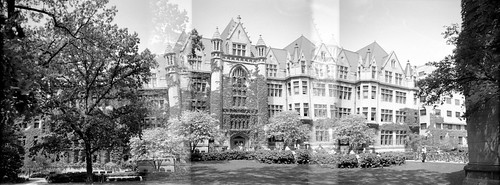
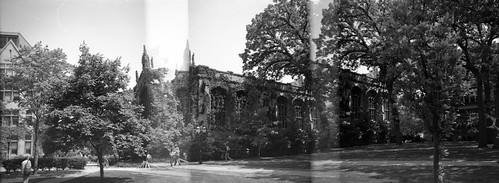
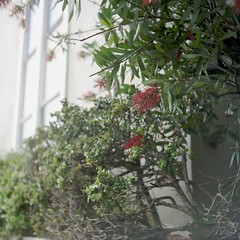
Pink Flower Bush; Yashica D, Kodak Portra 400VC


I took the chance while testing the camera to also test some color film, in this case Kodak Portra 400VC. Every time I shoot color film I keep hoping it will look great, and every time I'm reminded why I shoot black and white film, and use digital for color work. That said, many frames on the test roll came out nicely. The Yashikor lens is supposedly only the second best lens found in Yashica TLRs, but from these tests I think I'll be quite happy with it.

Red Plant Telephone Pole Fire Box
Pink Tree Empty Lot
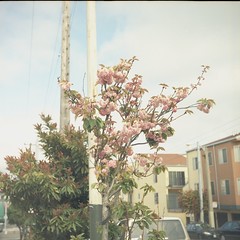
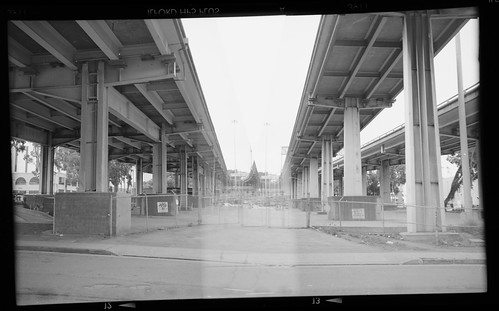
Various; Yashica D, Kodak Portra 400VC


The inside shots of the Yashica D were all taken using a Canon 200mm f/2.8L lens, with some of them using 56mm of Kenko extension tubes as well. Strobist setup was one Canon 430EX into a reflective umbrella high above left of the subject; the white board used as a base also acted as a nice reflector, spreading the light around even more. The outdoor shot used a Sigma 10-20mm, with one Canon 430EX bare on a GorillaPod camera left. More to come in a further post about shooting camera pictures with flash outdoors.

Yashica D Nameplate
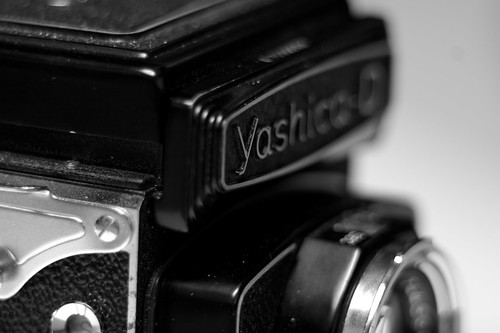
Yashica D Nameplate; Canon 30D, Canon 200mm f/2.8L, Kenko 56mm extension tubes, Canon 430EX

First Overlapping Frame Scan

Freeway (Overlapping Frames)
Freeway (Overlapping Frames); Zeiss Ikon Nettar 518/16, Ilford HP5+

This is the scan from my first overlapping frame test (inspired by Stephen Schaub at Figital Revolution). I looked at his technique, and was inspired (as I believe several people have been) to apply it on a 120 camera with using a red-window system, in order to precisely control the frame spacing at something besides the usual spacing. In preparation for this, I got some used 120 Ilford backing paper, and measured where a normal 6x6 frame (usually 56mm x 56mm) would go, based on the knowledge that the red window is in the center of the frame. Then I worked out what other marks on the backing paper I could center in the red window in order to get nicely overlapped frames, as well as what the next number that I could use for a frame after that would be. I came up with a few systems; to understand these, remember that Ilford 120 backing paper has a system where it shows circles of increasing size before you reach the next frame number.

  1. 2x overlap; place the first frame on the number, and the second frame on the second pre-frame circle. Width is about 95mm with about a 30% overlap; this uses 2 normal frames only (so if you used frame #1, and then the second circle before frame #2, the next frame could use frame #3). This is the method used in the example above.

  2. 3x overlap v1; 1st frame on the number, 2nd frame between the 3rd and 4th pre-frame circle, 3rd frame on the first pre-frame circle. Width is about 150mm, with about a 10% overlap between frames; this uses 3 normal frames (so if your last frame is on the first pre-frame circle before frame #3, the next frame could use frame #4).

  3. 3x overlap v2; 1st frame on the number, 2nd frame on the first pre-frame circle, 3rd frame just left of the next number. Width is about 120mm, with about a 50% overlap between the frames. This means that the middle frame will be almost completely overlapping the other two frames, and it looks better if you give the middle frame 1 stop or so less exposure than the outside two. This uses 2 normal frames, as with the 2x overlap technique.


My current favorites are the first two; the first one is nice and compact, and gives a combined exposure a little wider than a 6x9 frame, while having a fairly large overlap; the second one is w-i-i-i-i-ide, and the smaller overlap area should make it easier to get the overlaps to look good. However, the overlaps are what makes this technique different than just stitching together panoramic frames, and so I'd like to come up with a 3 frame technique that has closer to a 30% overlap, as compared to the 10% or 50% of my current two choices. 4 or 5 frame overlaps would be nice too, for a very panoramic view, but I think I'll try and get some more practice first before tackling that.

Speaking of practice, you can see from the doubled light posts and the strange triangular feature in the scan above that I didn't get the camera movement quite right here. More practice will help me get better with this, but I also have some additional plans to try and make this better (in a nutshell, either put the whole frame out of focus or with narrow DOF, or just make sure that the overlap portion is somewhere outside your DOF, such as at infinity with a wide open aperture).

More to come on this, including cyanotype prints of this technique, plus more scans of techniques #1 and #2.